This page covers initial endpoint verification. For verifying webhook payload signatures from vehicles, see Payload Verification.
VERIFY event to confirm your endpoint is ready. Your endpoint must respond correctly before Smartcar will deliver any vehicle data.
The VERIFY Event
Smartcar sends a challenge request to your callback URI in this format:Required Response
Your endpoint must respond with:- Status code:
200 OK - Content-Type header:
application/json - Response body: A JSON object containing the HMAC-SHA256 hash of the challenge
Generate the HMAC
Create an HMAC-SHA256 hash of thechallenge string using your Application Management Token as the secret key:
Return the Response
Return the hex-encoded hash in your response body with the keychallenge:
Response Body
Verify webhook challenges inside the Dashboard
Use the Smartcar Dashboard to understand exactly what Smartcar expects before you enable webhooks in production. The Verify webhook modal shows a sample challenge string plus language-specific snippets so you can implement the same HMAC signature in your code.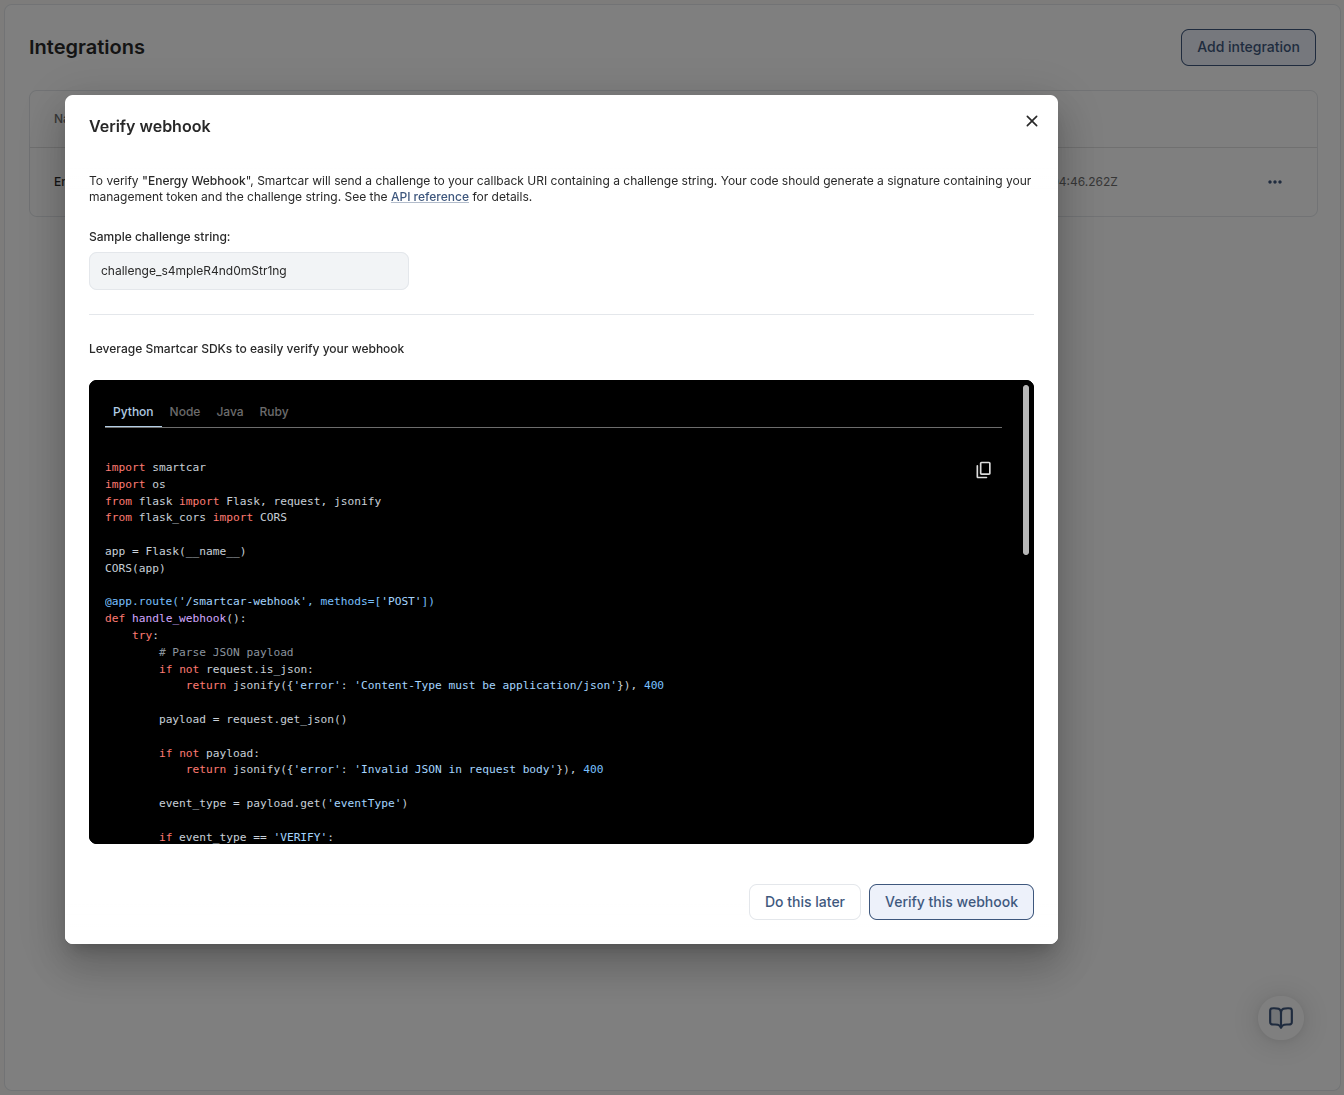
1
Implement the signature in your handler
Copy the challenge string from the modal and use the embedded snippets (Python, Node, Java, or Ruby) as references while you code the signature logic on your server. Run your handler locally or in staging so it is ready to answer Smartcar’s challenge.
2
Trigger Smartcar’s verification call
Once your server is ready, click Verify this webhook. Smartcar sends the challenge payload to your callback URL, and your code responds with the signature it just produced.
3
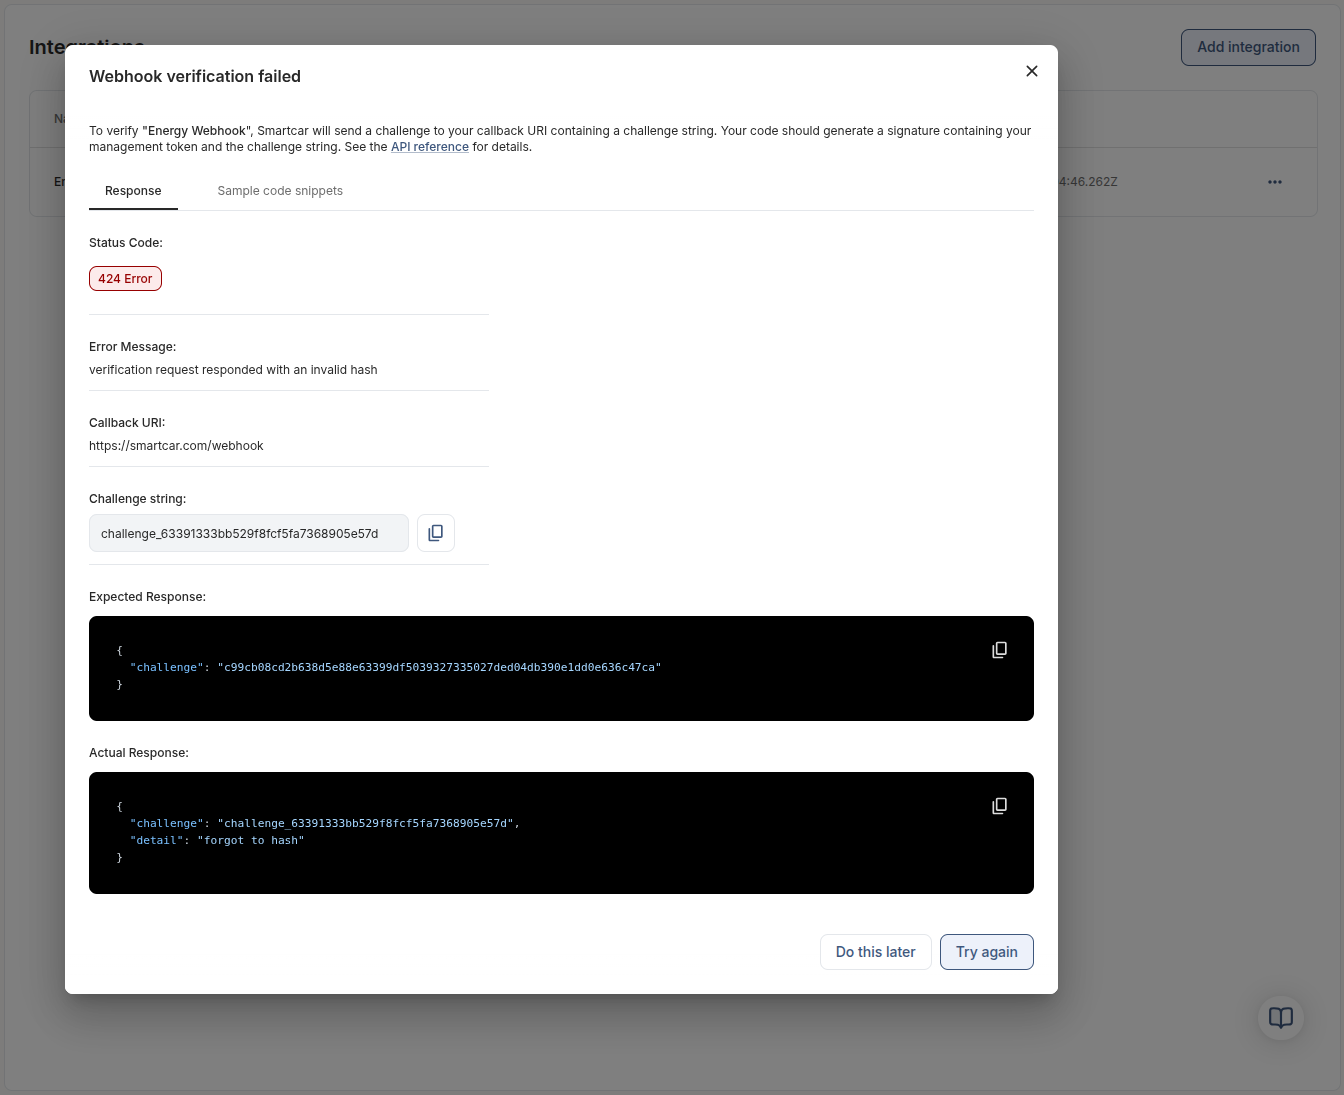
Compare expected vs actual responses
The Response tab displays the HTTP status, the challenge Smartcar sent, the signature Smartcar expected, and the body your server returned. Use this side-by-side view to confirm success or adjust your implementation before retrying.